Showing posts with label Bread. Show all posts

10.29.2013

Pumpkin Cinnamon Rolls with Maple Icing

Warm spiced rolls with a hint of pumpkin. They’re the perfect addition to a fall breakfast or brunch.


In true Ohio fashion, it went from beautiful fall to “WHY IS IT SNOWING ALREADY?” in the course of about a week. No major snowfall or anything, but I was still upset to have to brush even a little snow off my car before work in the morning. This is supposed to be prime hoodie and sweater weather, not break out the thick winter scarf and reluctantly turn on the heat time. Luckily we’re smack in the middle of warm cinnamon spice season, so it’s perfectly acceptable to warm myself up from the inside out.


I’ve made pumpkin cinnamon rolls before. And they were quite easy and delicious. For the past month, those rolls have been popping up all over my Pinterest, as more and more people seek out all things pumpkin. But looking at that picture day after day… Well, it started to get to me. In the back of my mind I kept thinking, “good Lord that’s some terrible photography. I’ve got to remake those.”

So here you go. A new recipe, merely because I’m vain. And embarrassed at my lack of skills.


They’re soft and tender, perfectly spiced, and not overly pumpkin-y, so even pumpkin haters can enjoy them.

They take some time to prep and proof (about 3 hours total time), so plan ahead if you want to serve them for breakfast or brunch. To save yourself a lot of early morning kitchen stress, prepare them, following the recipe until the second rise, the night before, then cover and refrigerate the rolls in the pan overnight. The next morning, about 2 hours before you want to serve them, remove them from the fridge and allow them to finish their second rise in a warm place, for about an hour, before baking them. Allow them to cool slightly, ice them up, and be the hero of breakfast.


Pin It

3.05.2012

BBQ Chicken Pizza

Who doesn’t love pizza? I certainly do! With pizza, there’s something for everyone, no matter what your tastes are. For me, I love a good traditional sausage pizza. Maybe some pepperoni on occasion, but it all depends on where it’s from. Some pepperoni is too wimpy, some too greasy, and some shrivels up into nothing but a tiny crunchy grease cup. But if I get to pick any pizza I want—anything my little heart desires, I’m always going to pick BBQ Chicken Pizza. Always. It’s my absolute favorite, pretty much no matter where it’s from. But going out for pizza tends to get expensive, and with Boyfriend and I trying to cut back on eating out, I’ve started making my own. And I have to say, while it’s a bit more work than just dialing the local pizza place, it’s every bit as delicious.


The dough is super simple—it’s Pioneer Woman’s basic pizza dough. I sweetened it up with a bit of honey because I’m a sucker for anything sweet. Throw the ingredients in the mixer and mix until it’s just combined. No kneading. No fuss. Just mix and let rise for about an hour. Or make it a couple days before and throw it in the fridge until you’re ready to use it. It makes enough dough for 2 extra large pizzas, 3 large pizzas, or 4 medium sized pizzas. Cut the dough down even smaller for personal sized pizzas. I wrapped my leftover dough in plastic wrap, put it in a plastic bag and tossed it into the freezer, so I can make pizza whenever I want!


Pizza’s pretty self explanatory—throw whatever you want on top and bake. I made mine with some homemade Honey Chipotle BBQ sauce, some mozzarella cheese, and cooked chicken. Sometimes I toss some bacon crumbles on top too. It’s kind of amazing. Most places throw sliced red onions on it too, but I’m not a fan. After it comes out of the oven, top the pizza with a little (or a lot) of finely chopped cilantro for a pop of color and flavor.

I think I’ll be having pizza night about once a week now. 

What do you like on your pizza?


PS- I'm thinking about adding a little bit of nutritional info to my posts, like how many calories and how much fat are in each recipe. Is that something you'd like to see?

Pin It

1.28.2012

Cornbread

During my senior year of college, between full time classes with more homework than I’d ever had before, a part time job at the grocery store, and an internship with the local police department 3 times a week, I barely had any free time. What time I did find, I lacked all motivation to slave it away in the kitchen. So I rarely cooked. My big meal was baked chicken. Over and over again. But when I didn’t have the time, I’d just throw a box of Jiffy cornbread in the oven and call it a meal. Countless nights I sat at our little kitchen table, highlighter in one hand, reaching for a plate of cornbread with the other.


I wish I would have known about this cornbread years ago.

This? This is no Jiffy cornbread. This is the real thing—thick and dense, yet moist. This cornbread has substance. The cornmeal gives it just the slightest cruch and the honey gives it just a touch of sweet. And it’s incredibly easy to throw together. The first time I made it, I went from sitting on the couch reading my Everyday Food magazine to putting it in the oven in just 15 minutes. The 2nd time, it took me longer to find the magazine again than it did to actually make it! So skip the Jiffy and make your own. It’s the perfect side for a bowl of chili in the cold months.


Warm and fluffy, slathered with a heaping scoop of sweet jam or honey and butter— there’s something completely comforting about a big pan of cornbread.


Pin It

1.20.2012

Lemon Pull Apart Bread

I give you fair warning—if you’re still going strong on your New Year’s Resolution (go you!), turn away. This isn’t for you. This will completely and utterly derail you from your goal, and I don’t wish to be responsible for your demise. So quick—look away! Click somewhere else! Save yourself! For the rest of us… Behold. The carboholic’s dream.


Lemon Pull Apart Bread. Layer upon layer of delicious lemony sugar coated carbs. Amazing. Beyond amazing! So incredibly good, you won't be able to control yourself.

I’ve seen these pull apart breads around for quite awhile, usually in Joy the Baker’s cinnamon adaptation, but I’d never gotten around to trying it out myself. Until I saw the lemon version. Something just clicked, and I HAD to make it.

In every post I’ve read about these pull apart breads, they always say they totally just stood at the counter eating piece after piece of this stuff still warm from the oven. I thought it was just an exaggeration—surely all these people could control themselves better than that, right? Wrong. After the first bite, I knew they weren’t just exaggerating. I found myself just standing there, like so many others before me, pulling piece after piece off, indulging in the utter bliss that only warm sugary carbs can give you.


I’m telling you. This bread is like crack. Bright, lemony, candied, carbolicious crack. You won’t be able to stop. You’ll literally stand there, shamelessly pulling piece after sticky piece, losing all control of your senses. You’ll eat half the loaf within hours. You’ll proclaim to the whole world, “Oh... If I die tonight, I'll be going down in a heavenly blaze of carboholic glory.” You’ll find yourself at 3am pulling off just one more piece. Your clouded senses will convince you that it’s really okay to have a couple more pieces for breakfast the next morning. Within 24 hours you’ll have singlehandedly finished off an entire loaf of bread all by yourself. And you’ll dream about making more before you’ve even finished the last piece.

I’m already plotting a roll version of this. Like a cinnamon roll. But with lemon instead. Oh it will be done. I’ve already got the lemons waiting on me. Must. have. more.

Pin It

11.23.2011

Pumpkin Cinnamon Rolls

Tomorrow is a day of true indulgence. We’ll pile our plates high with turkey and stuffing and sides, eat until we’re on the brink of explosion, then go back for dessert. Unbuttoning our pants and falling asleep on the couch are perfectly acceptable, if not encouraged behaviors. And as punishment for uttering that dirty, four letter d-word, “diet”, our mouths are washed out with pie. It’s a day where calories don’t count and seconds and thirds are mandatory. So why not start the day with a truly indulgent breakfast as well? How about a batch of delicious, gooey pumpkin cinnamon rolls?


They’re soft and fluffy and full of warm spicy goodness. And Oh. So. GOOD! Believe me when I say these are seriously incredible. I made smaller rolls because I had every intention of taking them to work to share, but it was dark by the time I got around to taking pictures (darn you, Winter!) so I had to wait until the next day to shoot. In the meantime, I ate a couple. And then a couple more. And a few more after that. By the end of the night, I’d eaten about a quarter of the pan. Oh darn.. Now I don’t have enough to share. Guess I won’t take them with me to work.. Over the next couple days, I ate them for breakfast. I ate them for dinner. I ate them as a midnight snack. I ate the entire pan. by. my. self. And I thought about making more.

In addition to tasting incredible, they’re actually incredibly easy to make. There’s no kneading involved. Heck, I didn’t even use my mixer! At all. For any of it. I did every bit of it with a whisk and a rubber spatula. Even the frosting. So there’s no excuse not to make these! I’ll even give you my secret proofing tip if it’ll help convince you. My house is always freezing cold. (seriously. I JUST turned the heat on a couple days ago when the thermostat finally dropped down to 55 degrees. Inside my house.) That’s exactly how I like it. So that “warm” place to let your dough rise doesn’t really exist in my house. My trick? I put it in the oven and turn the preheat on for about 30 to 45 seconds, then turn it back off. Makes a perfect little warm spot for my rolls to do their proofing. And now you truly have no excuse.


Cinnamon rolls take some time to put together, and you’ve already got so much to do for Thanksgiving, so make it easy on yourself by doing most of the work the night before. You can do up through most of step #5 tonight. Instead of allowing to rise in a warm area the second time, cover the dish and put them in the fridge to proof overnight. In the morning, pull them out of the fridge, let them finish rising in a warm area for about a half an hour, then pop in the oven to bake! Just make sure to snag a couple before everyone devours them to pack as a snack to enjoy while you’re standing in the early morning Black Friday lines! Gotta keep your energy up!

Pin It

10.11.2011

Apple Braid

It’s 67 degrees and sunny, and right now, this is the view outside my window.


This is perfection--the fleeting few weeks where the mornings are crisp and cool, the afternoons are warm and bright, and the world bursts into flames of vivid color. These few weeks are what I’ve looked forward to all summer.

Every fall, Boyfriend and I try to make it out to a local farm to pick our own apples and pumpkins. The last few years, we’ve only made it for the pumpkins, but this year I was determined to get some apples too. Luckily, I found myself with a gorgeous, sunny Sunday off, so it was time to hit the orchard and start picking.


 I always feel bad for the apples that fall on the ground.

Our bag filled up fast, and after jumping mud puddles and climbing trees, we carried home 10 pounds of gorgeous apples. I would have loved to keep picking, but I knew I would struggle finding ways to use the ones I had. After scouring my usual recipe sources, I found the perfect inspiration in what has lately become my new obsession—Pinterest.

It’s there I found the Apple Braid that Rachael of La Fuji Mama posted on Eat, Live, Run. Think of it as "cinnamon roll meets apple pie and get’s braided up into a gorgeous loaf." Incredibly simple to put together and looks like a lot more work than it really is. The best part about it? It’s a yeast dough, but you don’t even have to let it rise. Just mix the dough together, knead it like you would normal yeast dough, roll it out, cut and braid, then bake.


My braid didn’t turn out quite as defined and gorgeous as Rachael’s. (Check out the link to see step-by-step photos of the braiding) I think because I tried to roll it out a bit too big, so my strips were really thin and stretched way too much, but it still turned out nice. (It would probably have also helped if I had a pizza cutter. Cutting with my knife just wasn't working.) I have to say though, while everyone else thought it was good, it still didn’t change my mind. I’m still not a fan of baked apples at all. I thought I’d overcome my baked fruit prejudice with my Peach Cobbler and Peach Handpies, but nope. I just don’t like baked apples. I’ve still got about 8 pounds left, so I’ll definitely be baking more, I just probably won’t be eating them myself... So.. Who wants some apple treats?

Pin It

7.20.2011

Cheddar Buttermilk Biscuits

I’m a picky eater. Well, picky might be an understatement. I hate pretty much everything. It would probably be easier to tell you what I do like, rather than what I don’t. But topping that lengthy hate list are vegetables and seafood. *gag* I’m a meat and potatoes girl. Carnivore to the core. Which makes it a bit interesting picking a restaurant with my 2 best friends—both have been vegetarians for well over a decade. Their one exception is seafood, so with 2 against 1, we would usually end up a Red Lobster quite a bit. Meh. The one chicken dish is mediocre at best, but the saving grace? The reason I’ll go along without much complaint? Those cheddar biscuits. The warm, salty, calorie laden diet disasters. Mmmm..

I have ingredients for cupcakes just waiting for me to use, but yesterday, after running errands in the oppressive heat, I lost all motivation to cream butter and sugar and pipe frosting. Even making cookies sounded like a chore. But biscuits? It took me all of about 30 seconds to be in the kitchen ready to go. Something about stuffing warm, buttery carbs in my face sounded a whole lot more appealing than baking cupcakes.


While these aren’t exactly like those blissful Red Lobster biscuits, and I wouldn’t call them a copycat recipe, they’re still delicious. Instead of “Cheddar Bay Biscuits”, Boyfriend called them “Cheddar ‘Nae’ Biscuits” all evening. Soft and fluffy, with the perfect salty bite from the cheese and garlic salt, they were just what I wanted. They’re a breeze to whip together, and are easy enough to serve with dinner any night. (Or just eat for dinner, like I did.) Better yet, smother them with sausage gravy for a delicious weekend breakfast. Oh man. I know what I’m using the rest for now.

Pin It

3.04.2011

Orange Bowknots

I’m obsessed with the idea of brunch. I don’t know why. Everything is pancakes and bacon and muffins in my mind right now. I can’t seem to get enough! I’ve had breakfast for lunch and dinner several times lately. I’ve scoured the internet for muffin recipes to bake. I even put up an entire display at work of nothing but brunch related cookbooks! (With I Love Bacon front and center. Cause let’s be honest-- I’ve been waiting for a reason to feature that book.) I’ve got brunch on the brain, and I think it’s because of these rolls.

I came across the recipe in my Better Homes and Gardens Cookbook, back when I made the Honey Knot Rolls. And I’ve been dreaming about them ever since. What could be a better brunch treat than a sweet orange flavored roll covered with an orangey drizzle. It’s like a cinnamon roll. Only orange! I could just imagine a heaping basket of warm rolls, hanging out next to the big stack of pancakes. Mmm.. Too bad I have no one to host a brunch for to serve these.

But not hosting a brunch didn’t stop me from devouring about half the batch of these on my own within a day. What can I say, I have a bit of a carb obsession… Luckily for me, and my stomach, these freeze very well. Keep them in a zip top bag in the freezer for a few weeks. Next time you’re having brunch, or just a carb craving, pull them out, pop them in the microwave for a few seconds, and ta-da! A nice orangey snack.

My only complaint about them, I wish they were just a little bit sweeter. They’re more on the dinner roll end of the spectrum than dessert roll. Next time I’ll maybe add some honey to the mix to up the sweetness factor.

Pin It

2.04.2011

Mini Soft Pretzels

The big game is only a few days away! Whether you’re a Packers fan, a Steelers fan, just watching the game for the commercials, or merely counting down the minutes until a new episode of Glee, chances are you’ll probably be munching on snacks at some point during the night. Sure, you could just pick up a couple bags of chips at the grocery store, but why not make something that’s sure to be a crowd pleaser—mini soft pretzels!

Cover with sea salt for a traditional taste to dip in mustard or nacho cheese. Dress it up with a sprinkle of cheese on top, or take it even further with garlic salt, Italian seasoning, and shredded mozzarella, dipped in marinara for an Italian twist. Looking for something sweet? Top with cinnamon and sugar and dip them into yogurt or cream cheese! They’re a snack for all tastes! And they’re surprisingly easy to make.

If you’ve made bread before, then you’re already set. If you haven’t, pretzels might be a good place to start. They’re less fussy than bread, and they don’t need that pesky long second proof. Even the twisting and shaping is simple!


1. Roll your dough into a rope about 12 to 15 inches long. Make a U-shape with the dough on the counter.
2. Cross the right end of the U over the left end about 3 to 4 inches from the top.
3. Cross the right end over the left end again, making a double twist at the top.
4. Fold the twist down so the ends touch the bottom curve of the U, shaping as needed to create the classic pretzel shape.

Or skip the shaping altogether and roll the dough out to an inch thick rope and cut into 1 to 1 ½-inch pieces to make pretzel bites!

A couple tips: If your dough keeps shrinking back while you’re trying to roll it out, let it rest for about 5 minutes before rolling out again. I rolled out about 6 to 8 pieces at a time, rolling until it would pull back, then setting it aside and moving on to the next piece. By the time I was done with the last piece, the first one had rested enough to roll out a bit more!
Also, don’t let your pretzels poach for too long in the boiling water, otherwise they’ll get a little soggy. I poached some of my pretzel bites while I was busy cutting the rest, letting them boil for an extra minute or so, and they ended up a bit squishy.

I know what I’ll be snacking on during the game. How about you?

Pin It

1.13.2011

Twisted Breadsticks

After so many sweets around the holidays, I’m having a really hard time getting back into the kitchen to bake a dessert. I just can’t make myself do it. Pouring through all my new cookbooks, I can’t find a single thing that jumps out and says, “Bake me now!” So I’ve turned to my newest obsession instead—bread. Rolls, pretzels, brioche, focaccia, breadsticks. I want to make (and eat) it all. I love bread. In every form. Especially the kind they bring you in restaurants to eat while you’re waiting for your meal. Most times, I fill up on the bread and end up taking most of my meal home with me, because I’m too full to eat anything else! When I decided to make pasta for dinner at Boyfriend’s, I knew I wanted to make breadsticks to serve along with it. Garlicky, delicious breadsticks.

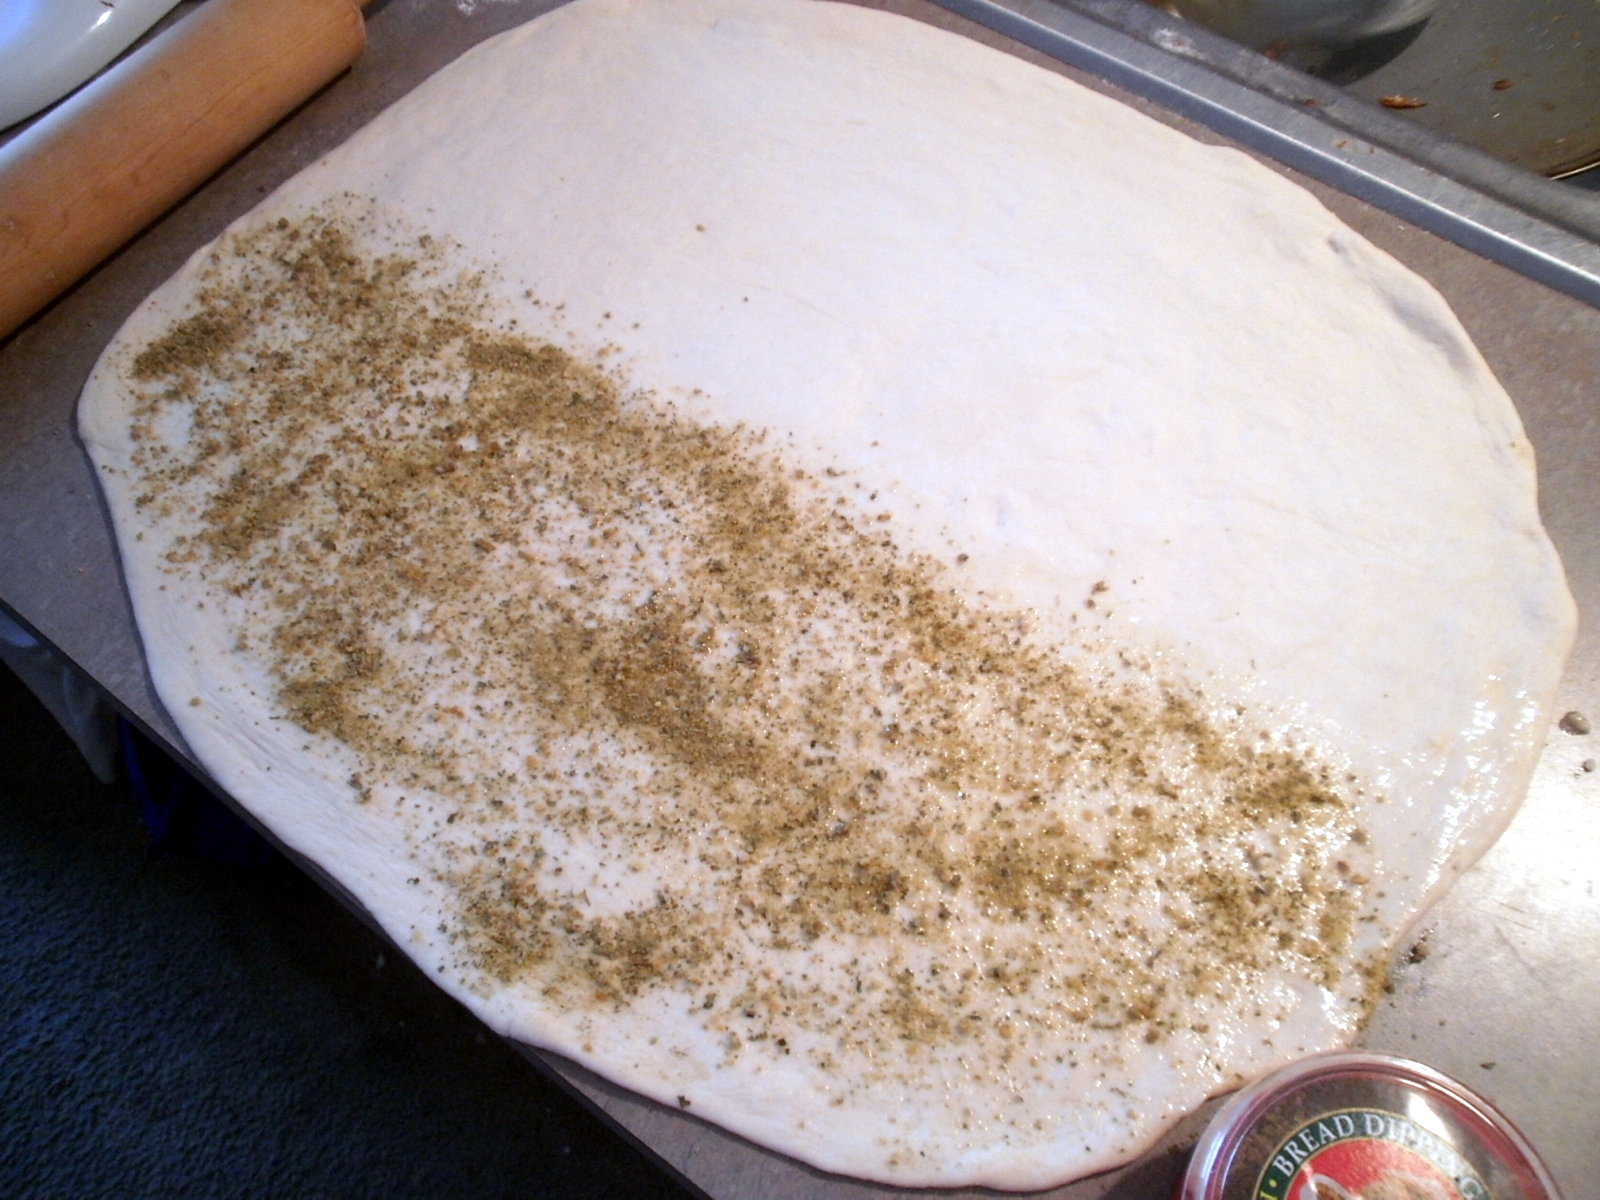
Slathered with garlic butter and sprinkled with herbs, they’re a great addition to any Italian meal. I used a big handful of some parmesan/herb dipping seasoning (the kind you add to olive oil for dipping your bread) that’s been hanging out in the back of my cabinet for who knows how long, but feel free to use a healthy sprinkling of parmesan cheese and some Italian seasoning instead. And definitely be sure to save some marinara sauce from your pasta, because these are perfect for dipping! For a different twist (get it, twist!), check out The Other Side of Fifty’s version, filled with pesto and sun-dried tomatoes!

How to make Twisted Breadsticks:

After your dough has proofed for 45 minutes to an hour in a warm place (and doubled in bulk), punch down and turn out onto a lightly floured work surface. Roll dough out into a large (12x18”) rectangle. Brush the bottom half (the longer part) liberally with garlic butter and sprinkle cheese and seasonings over top. (You’ll want to have some of the garlic butter left over to brush on top of the baked breadsticks.)


Fold the top half of the dough (the part without the seasonings) over the seasonings and press to seal the edges.


Brush your egg wash over top of the folded dough (which I totally forgot to do, but recommend for a nice golden breadstick) and cut into 1 ½-inch strips.


Twist dough into spirals and place on well greased baking sheets about 2 inches apart. Let proof a second time in a warm place for about 15 minutes, or until slightly puffed up. Bake for 15 to 20 minutes until lightly browned. Let cool for about 2 minutes, then brush tops with remaining garlic butter and sprinkle with coarse salt (or garlic salt) and Italian seasoning.


Pin It

1.05.2011

Honey Knot Rolls

I started the new year off with a brand new cold that’s left me couch-ridden and miserable for days, so I'll try to make this short. I've made enough cookies in the past month and a half to last me for a long time. I've had enough sweets to throw me into a diabetic coma. So I decided to post something different for a change. Something non-dessert related. I made rolls. And they were good. Really good.

Okay maybe this won't be that short. You know I can’t just leave it at that.

For months I’ve been taunted by pretty pictures of garlic knots all over Tastespotting and other blogs, making my mouth water for some delicious rolls. So when Thanksgiving rolled around, I finally had an excuse for some bread baking. I didn’t think garlic rolls would pair too well with turkey, so I skipped the garlic and sweetened them up with a bit of honey instead. With crazy work schedules and a whole lot of cookie baking, I never got around to posting them, or even taking pictures for that matter. But I couldn't let something this good slip through the cracks. So I made them again for Christmas! Even though I was stuffed to the point of getting sick, I couldn’t stop picking at them, they were so tasty! Soft and perfectly sweet, I could eat nothing but rolls every day and be happy.

Both times I made them, I started the day before and left the dough to proof in a bowl in the fridge overnight. Take it out about an hour to an hour and a half before you’re ready to bake to warm back up a bit, shape into knots, and proof a second time.

Pin It

10.11.2010

Pumpkin Donuts

I’ll admit it. As much as I try to be, I’m not a very patient person. When I want something, I want it now. I don’t want to wait for it. Especially when it comes to ideas for baking. If I get something in my head, I HAVE to do it. The idea will haunt me until I give in and make it. With all the fall recipes popping up everywhere, pumpkin flavored treats have been on my mind for over a month now. I want to try every new pumpkin recipe I see! The only problem—there was very little canned pumpkin available in the early days of fall when all the recipes started showing up. And it drove me crazy! Crazy enough to spend far too much on a small can of organic pumpkin from Whole Foods, just to say I finally had some in my possession. (And guess what I found at my grocery store the very next day? Yep. More pumpkin. At half the price. If only I had been just a bit more patient.)

Pumpkin Donuts


In the past, I’ve made pumpkin cookies, pumpkin cupcakes, and pumpkin cheesecake. But this year I wanted to make something completely different. After another trip to Buckeye Donuts, pumpkin donuts were all I could think about. (Have I mentioned how evil this place is? Their donuts are like crack—so addicting... you’ve gotta have more!) So I whipped up some dough, broke out my thermometer and started frying up my first pumpkin treat of the year.

Pumpkin Donuts

Unlike my first donut attempt that went perfectly smooth, this time I had a few bumps in the road. The dough is incredibly soft and sticky, so the lightly floured surface ended up a heavily floured surface in order to pat the dough out to cut, and it was almost impossible to keep the circles in tact while transferring them to the oil. Even putting trying to put them on a Chinese skimmer to drop them in, they stretched and tore and just ended up kind of ugly. I had a hard time keeping the oil at a constant temperature too. The first time, I had no issues whatsoever. It held steady the entire time. This time, it went from too cool to way too hot, dropped down to being too cool again, shot back up to being too hot… It was so inconsistent, so some of my donut holes ended up way too brown on the outside, and not completely cooked on the inside. And maybe it’s just me, but I swear I used practically every utensil, dish, and pot I own making these things! In a matter of hours I went from having a spotless kitchen to having a complete mess!


But, despite all the hassles, these were pretty tasty! Not overly pumpkin-y, so if you’re looking for a super pumpkin treat, these probably aren’t it, but still yummy anyway. I covered my big donuts in glaze (yum!) and the donut holes in a spiced sugar mixture (extra yum!). I only got 6 somewhat large donuts and about 10 donut holes out of half the recipe, so next time I’ll definitely make the whole recipe, and make smaller donuts, which will probably help with the stretching and tearing. Now to figure out what to do with the rest of my 7 cans of pumpkin! Yeah… I kinda went a little overboard... After last year’s pumpkin crisis, I felt like I needed to horde some this year... Not really necessary since this greets me every time I walk in the grocery store.

Definitely no shortage this year.


Pin It

7.02.2010

Red White and Blue Shortcakes

Strawberry ShortcakesGrowing up, and still to this day, my mom always made Strawberry Shortcakes with those prepackaged store-bought cakes. You know—the ones they stack right next to the display of strawberries. Those unnaturally golden sponges so laden with preservatives they could survive a nuclear holocaust. Essentially Twinkies without the cream filling. Well, these shortcakes here aren’t my mom’s Strawberry Shortcakes. These are the real thing. The way a Strawberry Shortcake should be. A baking powder biscuit, tangy with buttermilk, sweetened with a little bit of sugar, and laced with a bright pop of lemon zest throughout. It’s the perfect vessel to soak up all the delicious sweet juice of the berry mixture. It practically screams light summertime dessert. (Light in essence. Not necessarily in calories.)

Pin It

5.28.2010

Donuts! And No Scars!

DonutsI totally blame Boyfriend for this. He just HAD to take me to Buckeye Donuts last Friday on a random donut run. (And you know what? After writing “doughnut” 100 times in the past couple days, I think I actually like “donut” better. Call it what you wish, but it’s my post. So donut it is!) After shamelessly devouring 2 huge cream-filled chocolate-glazed donuts, one Friday night, the other Saturday morning, the monster was unleashed. By Sunday I was craving more. When I called Boyfriend on my way home from work, I jokingly demanded he bring me a donut and give me a foot massage when I got home, not realizing he’d respond with, “Be ready in 10 minutes. We’re going to Dunkin Donuts.” He’s such an enabler. Driving around only somewhat lost for a half an hour only increased my desire for a soft, fluffy, sugary shot of deliciousness, so imagine my sheer devastation when we pulled into the parking lot, only to be met by a dark storefront and not a car in sight. Closed?? What do you mean closed? Who closes at 10:30 at night on a Sunday?? Oh yeah... Just about everyone. But the monster inside, screaming for donuts, doesn’t understand the concept of business hours, so I had to take matters into my own hands.

Pin It

9.03.2009

Honey Whole Wheat Bread

Honey Whole Wheat BreadIt wasn’t long ago that I had an irrational fear of yeast. Well, okay. Not a fear really. More of a slight hesitation about using it. I just knew I would kill it somehow, and then my baking project would be sunk. But using yeast for the first time in my cinnamon rolls was much easier than I thought it would be. Maybe there was hope! I’ve always wanted to make bread, but it just seemed like too much work, and too risky. More yeast, and much more ingredients to possibly ruin. But I was willing to give it a try with my new found yeasty confidence. When Kiesha left for NYC, I inherited her multitude of flours—including 2 really full bags of both bread flour and whole wheat flour. As I found room for them in my pantry, the gears started turning in my head as I made space next my leftover packets of yeast and my half used bottle of honey. I remembered seeing a recipe in Martha for Honey Whole Wheat Bread. Sure enough, there it was. And thanks to Kiesha’s additions, I already had most of the ingredients. The only thing I was missing—wheat germ. But it can’t be that hard to find, right? Well, let me help you out and save you some time if you’ve never looked for wheat germ in your grocery store. It’s probably not with the baking supplies. Try near the oatmeal. It took me a couple weeks of grocery trips to multiple stores to figure that one out. (Yes. I’m just like a man. I never stop and ask for directions. It’ll take me a couple hundred wrong turns and half a day’s worth of lost time, but I’ll figure out where I’m going. On my own.)
Pin It

5.23.2009

Chipotle Mexicorn "Cupcakes"

CornbreadChipotle Mexicorn "Cupcakes"
Adapted from Chicago Sun Times and The Best of America's Test Kitchen 2009
Makes 1 dozen

1 cup yellow cornmeal
1 cup all-purpose flour
1/4 cup sugar
2 teaspoons baking powder
1 teaspoon baking soda
1 teaspoon salt
1 cup grated hot pepper Monterey Jack cheese (I used a Colby/MJ mix)
1/2 can (11oz) Mexicorn (Green Giant Brand), drained, or 1/2 can of corn kernels, drained, and 1/2 cup finely diced red bell pepper)
1 cup buttermilk
2 large eggs
1/4 cup canola oil
4 tablespoons (1/2 stick) unsalted butter
1 chipotle chile in adobo sauce, finely minced

1. Preheat the oven to 375 degrees.

2. Spread cornmeal on a rimmed baking sheet. Place in center rack of oven. Toast until color deepens and becomes fragrant, about 5 minutes.

3. Mix cornmeal, flour, sugar, baking powder, baking soda and salt in a large bowl. Stir in the cheese.

4. In a small saucepan or skillet, heat oil and butter. Swirl to mix until butter is completely melted. Remove from heat.

5. In another bowl whisk buttermilk and eggs. Slowly pour about 1/4 of oil mixture into buttermilk mixture, stirring constantly to temper. Slowly pour in remaining oil mixture and whisk to combine. Add chipotle chile and corn mixture, stirring to mix. Add to flour mixture, and stir only until it comes together.

6. Pour batter into well oiled cupcake tins. Bake until tester inserted in the center comes out clean, about 15 minutes. Turn out on a rack to cool.


Chile Lime Butter
Makes 1/2 cup

1 stick unsalted butter, softened
1/2 to 1 teaspoon lime zest (about 1/2 to 1 lime)
1 tablespoon lime juice (about 1/2 a lime)
1/4 to 1/2 teaspoon cayenne pepper (to taste)
Pinch of salt

1. Stir ingredients together until combined. Chill until ready to use.


Cornbread and ChiliMy second IronCupcake: Earth entry! This month's challenge was creating a savory cupcake. Ah! I don't do savory! #1-- I can't cook! (Okay that's not entirely true. I can. I'm just not very skilled at it.) #2--My insatiable sweet tooth doesn't understand the concept of savory. Even things I do cook have a sweet element to it! (That chili over there in the picture? Totally has brown sugar and chocolate in it..) What could I make that would pass as a savory cupcake?! The only thing I could think of was some kind of cornbread. Better make it spicy and full of corn to resist any temptation to lead it to the sweet side.

I found a recipe for cornbread in the Best of America's Test Kitchen 2009 magazine I bought for Boyfriend a couple months ago. It sounded pretty good, so I "borrowed" the magazine from him. (It's not like he was really using it anyway. *hint hint Boyfriend: make me dinner!*) As good as it sounded, it didn't have many savory elements to it. With a little more searching, I turned up a recipe for Chipotle Cornbread, chock full of red bell peppers and chipotle peppers. Score! Now let's throw a bit of corn in there too, for good measure.

While I was out shopping for my ingredients, I came across a can of Mexicorn--a mix of corn, and red and green bell peppers--from Green Giant. Absolutely perfect! Now I don't have to worry about what to do with the rest of the red bell pepper I was going to buy. (Eating it is completely out of the question. Yuck!)

I took some of the methods from the ATK recipe, like toasting the corn meal first to enhance the flavor, as well as the addition of melted butter to the oil. Honestly, I don't know that either of these really added to the flavor, so don't feel like you have to do these. (If you're not using the butter, don't worry about heating the oil. This was just to combine the butter and the oil together.) Both recipes called for making one large cornbread loaf in a cast iron skillet. Well that wouldn't be very cupcake like, would it? (Plus I don't have a cast iron skillet..) I poured the batter into well greased cupcake tins instead. I also adjusted the cooking time. I wasn't sure how long to put them on for, so I started with 15 minutes on the timer. That ended up being the magical number; they were done perfectly when I checked on them.

Sure, they were perfect little cupcake shapes, but they still didn't scream "cupcake" to me. They were missing something very important. Something that distinguishes a cupcake from it's muffin cousin. Frosting. What could I possibly put on a spicy, savory cupcake? I decided on a Chile Lime Butter "frosting". I absolutely love the combination on grilled corn. Mmm the sweet kernels of corn, dripping with buttery goodness, mixed with a bit of a tartness from the lime and a kick from the cayenne pepper. Since corn is the star of this show, I thought it would pair well. (Just go easy on it. The amount I slathered on the top were for photos only. No way could I ever eat that! I'm not Paula Deen y'all.)


Overall, it's an alright cupcake (*cough* muffin..). Not the best I've ever had, but not completely inedible. It's got a very strong chipotle flavor to it. It pretty much overpowers everything else. Maybe next time I'll just use ground chipotle powder instead of the chopped chiles. And I don't really like eating it with the Chile Lime Butter, even after I scraped the majority of it off after taking pictures. Maybe on plain cornbread? There's just too competing flavors. Honestly, I'd take a Jiffy corn muffin over these any day.. Slather a little jam on top.. Mmm.. But maybe that's just my sweet tooth talking again.

Even though they weren't the greatest creation on Earth, thanks for showing your Busty Baker love by voting for my Chiptole Mexicorn Cupcakes! Here's the awesomeness I could've won!

Our May ETSY PRIZE-PACK is from artists:
Last and certainly not least, don’t forget our corporate prize providers: HEAD CHEFS by FIESTA PRODUCTS, http://www.fiestaproducts.com, HELLO CUPCAKE by Karen Tack and Alan Richardson, http://blog.hellocupcakebook.com, JESSIE STEELE APRONS http://www.jessiesteele.com; TASTE OF HOME books, http://www.tasteofhome.com; a t-shirt from UPWITHCUPCAKES.COM http://www.upwithcupcakes.com/. Iron Cupcake:Earth is sponsored in part by 1-800-Flowers, http://www.1800flowers.com .

In hindsight, I wish I would have made these awesome Corn on the Cob Cupcakes from Hello Cupcake by Karen Tack and Alan Richardson (which I could win!), instead. How much cuter would these have been? And certainly yummier too! But I guess not really "savory"..

Picture from Hello, Cupcake! Book, page 25
Pin It

5.04.2009

Cinnamon Rolls with Cream Cheese Icing

Cinnamon RollsCinnamon Rolls
From Better Homes and Gardens: The New Cookbook, page 144
Makes 24 rolls

4 3/4 to 5 1/4 cups all purpose flour
1 package active dry yeast
1 cup milk
1/3 cup butter
1/3 cup granulated sugar
1/2 teaspoon salt
3 eggs
3/4 cup packed brown sugar
1/4 cup all purpose flour
1 tablespoon ground cinnamon
1/3 cup butter or margarine
1/2 cup chopped pecans (optional)
1/2 cup golden raisins (optional)
1 tablespoon half and half or light cream

1. In a large mixing bowl, combine 2 1/4 cups of the flour and the yeast. In a saucepan heat and stir milk, 1/3 cup butter, granulated sugar, and salt just until warm (120 to 130F) and butter almost melts; add to flour mixture along with eggs. Beat with an electric mixer on low speed for 30 seconds, scraping bowl. Beat on high speed 3 minutes. Stir in as much of the remaining flour as you can.

2. Turn dough out onto a lightly floured surface. Knead in enough of the remaining flour to make a moderately soft dough that is smooth and elastic (3 to 5 minutes total). Shape dough into a ball. Place in a greased bowl; turn once. Cover; let rise in a warm place until double (about 1 hour).

3. Punch dough down. Turn out onto a lightly floured surface. Divide in half. Cover; let rest for 10 minutes. Meanwhile lightly grease two baking sheets; set aside. For filling, stir together brown sugar, the 1/4 cup flour, and cinnamon; cut in 1/3 cup butter until the mixture resembles coarse crumbs.

4. Roll each half of dough into 12x8-inch rectangle. Sprinkle filling over dough rectangles. If desired, sprinkle with raisings and/or pecans. Roll up each rectangle starting from a long side. Seal seams. Slice each roll into 12 pieces. Place cut sides down on prepared baking sheets.

5. Cover dough loosely with plastic wrap, leaving room for rolls to rise. Chill for 2 to 24 hours. Uncover; let stand at room temperature 30 minutes. (Or, to bake rolls right away, don't chill the dough. Instead, cover loosely; let dough rise in a warm place until nearly double, about 30 minutes.)

6. Break any surface bubbles with a greased toothpick. Brush dough with half-and-half. Bake in a 375F oven for 20-25 minutes or until light brown (if necessary, cover rolls with foil the last 5 to 10 minutes of baking to prevent overbrowning). Remove from oven. Brush again with half-and-half. Cool for 1 minute. Carefully invert rolls onto a wire rack. Cool slightly. Invert again onto a serving platter. Ice with frosting or drizzle with glaze.

Cream Cheese Frosting
From Recipezaar

8 ounces cream cheese, softened
1/2 cup (1 stick) unsalted butter, softened
1 teaspoon vanilla
3 cups confectioners' sugar
1 tablespoon milk

1. Stir together all ingredients until smooth.


Cinnamon RollsI decided last week to embark on a journey into new baking frontier. It was completely foreign
territory--one I had never experienced before in my years of recreational baking-- and I was absolutely terrified of the exotic, temperamental beast I was about to wrestle with. Knowing others who have ventured into this land, I've heard the stories of triumph and also those of tragedy. I felt it was time to experience it for myself. I finally took on the challenge of baking with yeast for the first time--I made homemade cinnamon rolls.

The week before, Boyfriend and I hit the mall to catch a movie (Seth Rogen's Observe and Report. Odd movie, but I love Seth Rogen). I had just gotten off of work and was kind of hungry but not completely starving, so we decided to grab a quick snack. Right next to the box office is the most glorious place on Earth--Cinnabon. Mmm. Savoring each bite of those warm gooey pieces of heaven, I thought to myself, I need to make these. It took about a week for me to work up the nerve to attempt it, but I finally made myself some cinnamon rolls!

Yeast scares me. I don't know why. Maybe it's the idea of playing the part of a mad scientist, ready to scream "IT'S ALIVE!!" at my foaming, growing, crazy little creature in my bowl.. Or the fact that you have to treat it just right or you'll either not bring it to life at all, or kill it immediately. I'm not the greatest at keeping things alive.. (Except my cat. He seems to be fine. But plant life--I'm the Black Widow of houseplants.) So I was a little hesitant to try my hand at a yeasted baked good. Would it rise? Or would I kill it? I was glad to find that yeast comes in packages of three at the grocery store, because I had already told myself I was getting more than one, just in case. I've made too many trips BACK to the grocery store when something has gone wrong--I've learned to prepare for the worst the first time around. With enough yeast for 3 attempts, I felt a bit more at ease, and ready to take on the beast.

My first worry came as I was kneading my dough. It was sticky and wasn't looking like the smooth elastic ball it was supposed to. I had already used all the flour I was supposed to use, and it still didn't feel right. So the "lightly floured surface" turned into a heavily floured surface, and I kneaded away. Finally it came together and went into the oven with a bowl of warm water for its first proof. I held my breath waiting to check on it. I finally peeked at about an hour--success! It was double in size and pushing up on the plastic wrap I had covering it! Time to roll it out and sprinkle the cinnamon! Rolling it was really easy.. It was the sprinkling that I had trouble with. The recipe calls for cutting butter into the brown sugar-cinnamon mixture. I'm sure this would have worked well if I had done it on any other day.. But the day I chose to bake was the most beautiful day of the year so far. It was sunny and in the 80s, so I took the rare opportunity to open up the doors and windows and enjoy the sun! The only problem--it made cutting my butter next to impossible. It was too warm in the house and my well chilled butter started to soften up almost immediately. The coarse crumbs it was supposed to make ended up as a paste instead. Sprinkling wasn't an option anymore, so I scattered the chunks around the dough and spread it with a knife instead. Next time I might just spread softened butter by itself on the dough and sprinkle the brown sugar-cinnamon mixture on top, rather than trying to mix them.

After rolling up and cutting the dough, they went into the oven for the 2nd proof before baking. Again--Success! I brushed them with the heavy cream I had left over from the Vanilla Bean Scones and put them in the oven. The recipe says to bake them for 20-25 minutes. I strongly suggest checking them starting at about 10 minutes. When I went to rotate them at the 10 minute mark, they already looked well on their way to being done. I reset the timer for another 5 minutes to check on them again, but decided to take a look a little early. 14 minutes and they were overbrowned. I think they were probably about done at 12 minutes. So definitely check them early! If I had left them the full 20 minutes it suggested I would have had burnt little hockey pucks!

The recipe suggests coating the rolls in a Vanilla Glaze. It sounded alright, but I really wanted something that tasted more like my beloved Cinnabon. Searching the web, I found recipes for Cinnabon's Cream Cheese Frosting. Mmm. I love cream cheese frosting so much. The one I ended up using was very yummy, but not quite as fluffy and light as Cinnabon's. It was still pretty good though! I definitely suggest making these to serve a crowd. I made a whole batch and gave half to Boyfriend and kept the other half for myself. I ended up eating the entire half a batch, and in the process gained about 5 lbs. (That also could have been from my diet-disaster weekend in Cleveland to see the Indians play the Red Sox on my birthday! I think it's the rule of Grandparents to make sure you're well fed. Dinners of fried chicken and breakfasts full of pancakes, eggs, and more bacon than you can shake a stick at were the theme of the weekend. Not to mention the entire tote bag full of snacks we took to the game. And I completely broke my no-soda rule and had a Cherry Dr. Pepper.. Then I finished off the Cherry Coke from my Hi-Hats that was still hanging out in my fridge when I got home! Time to hit the gym. Hard.)

Cinnamon Rolls

My first baking experience with yeast is complete! It actually wasn't as scary as I thought it would be. It ended up being somewhat pleasant. Except for my house smelling like yeast for about a week. They were good, but didn't quite live up to my hopes for them. They were a little dry--not quite the soft, fluffy, melt in your mouth rolls I had dreamed of. I'm not sure if that was because of the overbaking or the recipe itself. I guess I'll have to try again someday, and try for a better frosting recipe too. I liked you Cinnamon Rolls, but Cinnabon definitely has you beat.
Pin It
Related Posts with Thumbnails